Saturday, October 29, 2016

Mini Tic Tac holders including tutorial!!

Hello,
Here are my latest creations.
They are mini Tic Tac Holders for Halloween, Thanksgiving and Christmas.
Here they are "closed."
This is how they look when you pull on the ribbon to pull out the Tic Tacs.
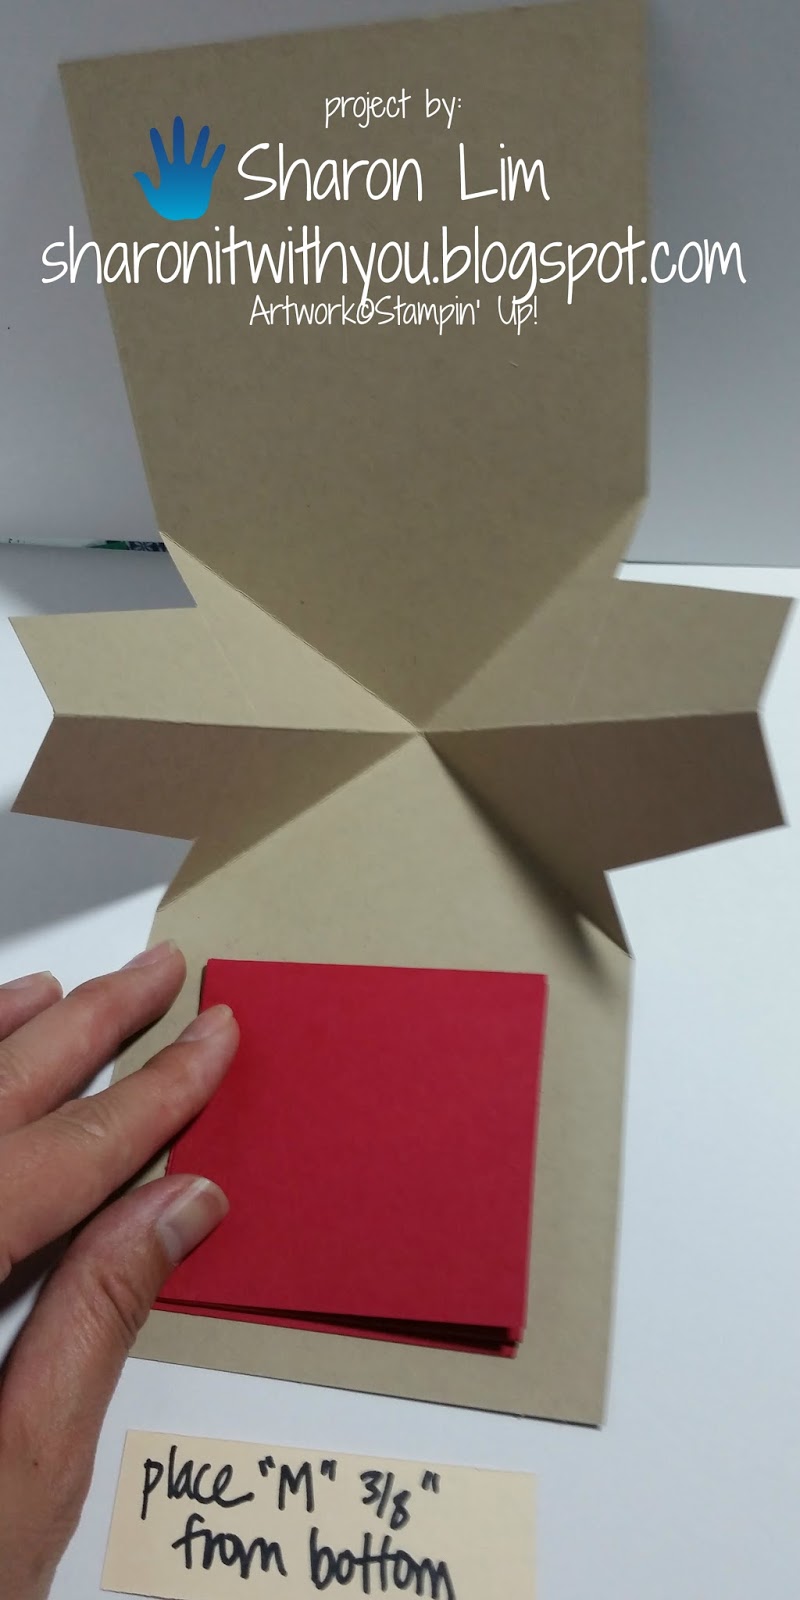
Since I needed to make a number of them, I first started with a piece of Whisper White cardstock that was 4-1/4" by 11" and scored it at:
  • 1-3/8"
  • 2"
  • 3-3/8"
  • 4"

Then, you cut the cardstock at each 2-1/4" and you can get 4 per piece of cardstock.
Punch a circle in the center on both of the wider parts of the holder.
Fold along all the score lines to form the holder.
Place adhesive on the smallest tab of the holder, and fold flat.  I used Tear and Tape adhesive.
Put it together to form the holder.  It should look like this:
Cut a piece of ribbon that is 9 inches long and thread it through the holes, and line up the ends to match, so they are the same length.
Then, place the Tic Tacs and push it into the holder as it pushes the ribbon down.
Looking from the top, it should look like this:
Then, tie the ribbon, either like a knot in the picture, or you can tie a bow if you wish.  Add some Washi Tape to the bottom of the holder. Then, stamp a small image, then punch it out with the 1-3/8" punch, and attach it using a Stampin' Dimensional.
This is how all three look opened:
 This is how they look "closed."
Thank you for checking in!
Sharon


Sharon Lim
Stampin' Up! Independent Demonstrator #54149
Rubber Stamps and Accessories including Scrapbooking 

EMAILsharonitwithyou@gmail.com
CELL: (707)486-3500
PayPal.Me/SharonLim

Saturday, October 22, 2016

Fun side fold card including tutorial!!

Hello,
I had this card as my Make and Take at my Open House.
This is how you make it.  You start with a piece of Real Red cardstock that is 9-3/4" by 4."
You cut a slit at 1" from 3" to 7-1/2" when you have it vertical like this:

Then, you turn the card horizontal and score in three places.

  • Score 3" from the top to the cut line
  • Score at 5-1/4" from the top to the bottom of the card
  • Score at 7-1/2" from the cut line to the bottom

Fold the card so it looks like this: First a Mountain fold, then a Valley fold, with the bottom  part a Mountain fold and then ending with a Valley fold.
Attach a piece of Candy Cane DSP that measures 7/8" X 9-1/2"
Then attach 2 pieces of DSP measuring 2-3/4" X 2-3/4" and another one 2-3/4" X 4-1/4"
Stamp a sentiment on a piece of Whisper White measuring 1" X 3" and attach using Stampin' Dimensionals.
Stamp the reindeer from the Cookie Cutter stamp set using Crumb Cake on Crumb Cake cardstock and punch it out using the Cookie Cutter punch and attach using a Stampin' Dimensional on the part of the card that pops out.
Lastly, adhere it to a piece of Crumb Cake measuring 4-1/4" X 5-1/2"
And to make him "Rudolf," you can color his nose with a Real Red marker and then a dab of clear Wink of Stella!!

Thank you for checking in!

Sharon


Sharon Lim
Stampin' Up! Independent Demonstrator #54149
Rubber Stamps and Accessories including Scrapbooking 

EMAILsharonitwithyou@gmail.com
CELL: (707)486-3500
PayPal.Me/SharonLim

Monday, October 3, 2016

Updated Pop Up Fold Card Tutorial!!


Remember this Pop Up Fold card?
I wanted to make it with less paper so I could do 2 per one sheet of 8-1/2" X 11"
Here's my version to make the inside mechanism, start with a piece of cardstock measuring 5" X 8"
Score it at 2" and 6" when horizontal and then at 2-1/2" when vertical, so it looks like this:
Make marks on each score line, a 1/2" from both the top and bottom
Using a bone folder, score from the marks you made to form an "X"
Fold on all the score marks, starting with the 2 ends.
Then each of the diagonals along the "X" you formed, first the one side,
then, fold the other side.
Unfold, and then fold it in half, with the fold to the left.
Make a mark at 7/8" on the top, and then 1-1/4" on the top score line.  Then, repeat on the bottom.  Then draw a line from the marks you made.
Cut along the lines you drew and then along the score lines.
Your paper should look like this:
And, your mechanism is complete when it looks like this. 
Then, you can continue with the steps in my original post to complete the inside of the card.
Adhere the pop up inside card to the card base.
Next, take a piece of Real Red cardstock measuring 2-3/4" X 11" and score at 2-3/4", 5-1/2" and 8-1/4"
  Fold like an "M"
  Cut out 2-1/2" Crumb Cake squares and 2-1/4" Whisper White squares to layer and layer onto the Real Red squares "M" shaped paper.
Place the "M" centered on the bottom about 3/8"from the bottom.
Place adhesive only on the spot on the picture.
Then, close the card so the adhesive hits the "M"
Then, flip the card over and place adhesive in the same place on the opposite side.
And fold the card closed.
Now, open and close your card to make sure it opens and closes.
For the inside layer, cut a piece of Candy Cane Lane DSP (Decorative Series Paper) that measures 5-1/8" X 3-3/4" and mark 3-3/8" on each side and cut from those marks to the center on the top to get the house shape.
 Adhere the house shape to the top and bottom of the card inside.
Thank you for checking in!
Sharon


Sharon Lim
Stampin' Up! Independent Demonstrator #54149
Rubber Stamps and Accessories including Scrapbooking 

EMAILsharonitwithyou@gmail.com
CELL: (707)486-3500
PayPal.Me/SharonLim