Hello,
I love a card that moves, and REALLY like one that has a hidden message.

Here it is in action and the full tutorial video is at the bottom of this post:
Start with two pieces of Basic White, one that is 4-1/4" X 11" scored at 3-1/2" and at 7"
The second one that is 4-1/4" X 6-3/4" scored at 4-3/4"

Then two pieces of True Love Designer Series Paper (DSP), one measuring 4" X 4-1/4" (front) and another 4" X 3-7/8" (back).

Fold along the score lines like the picture below.

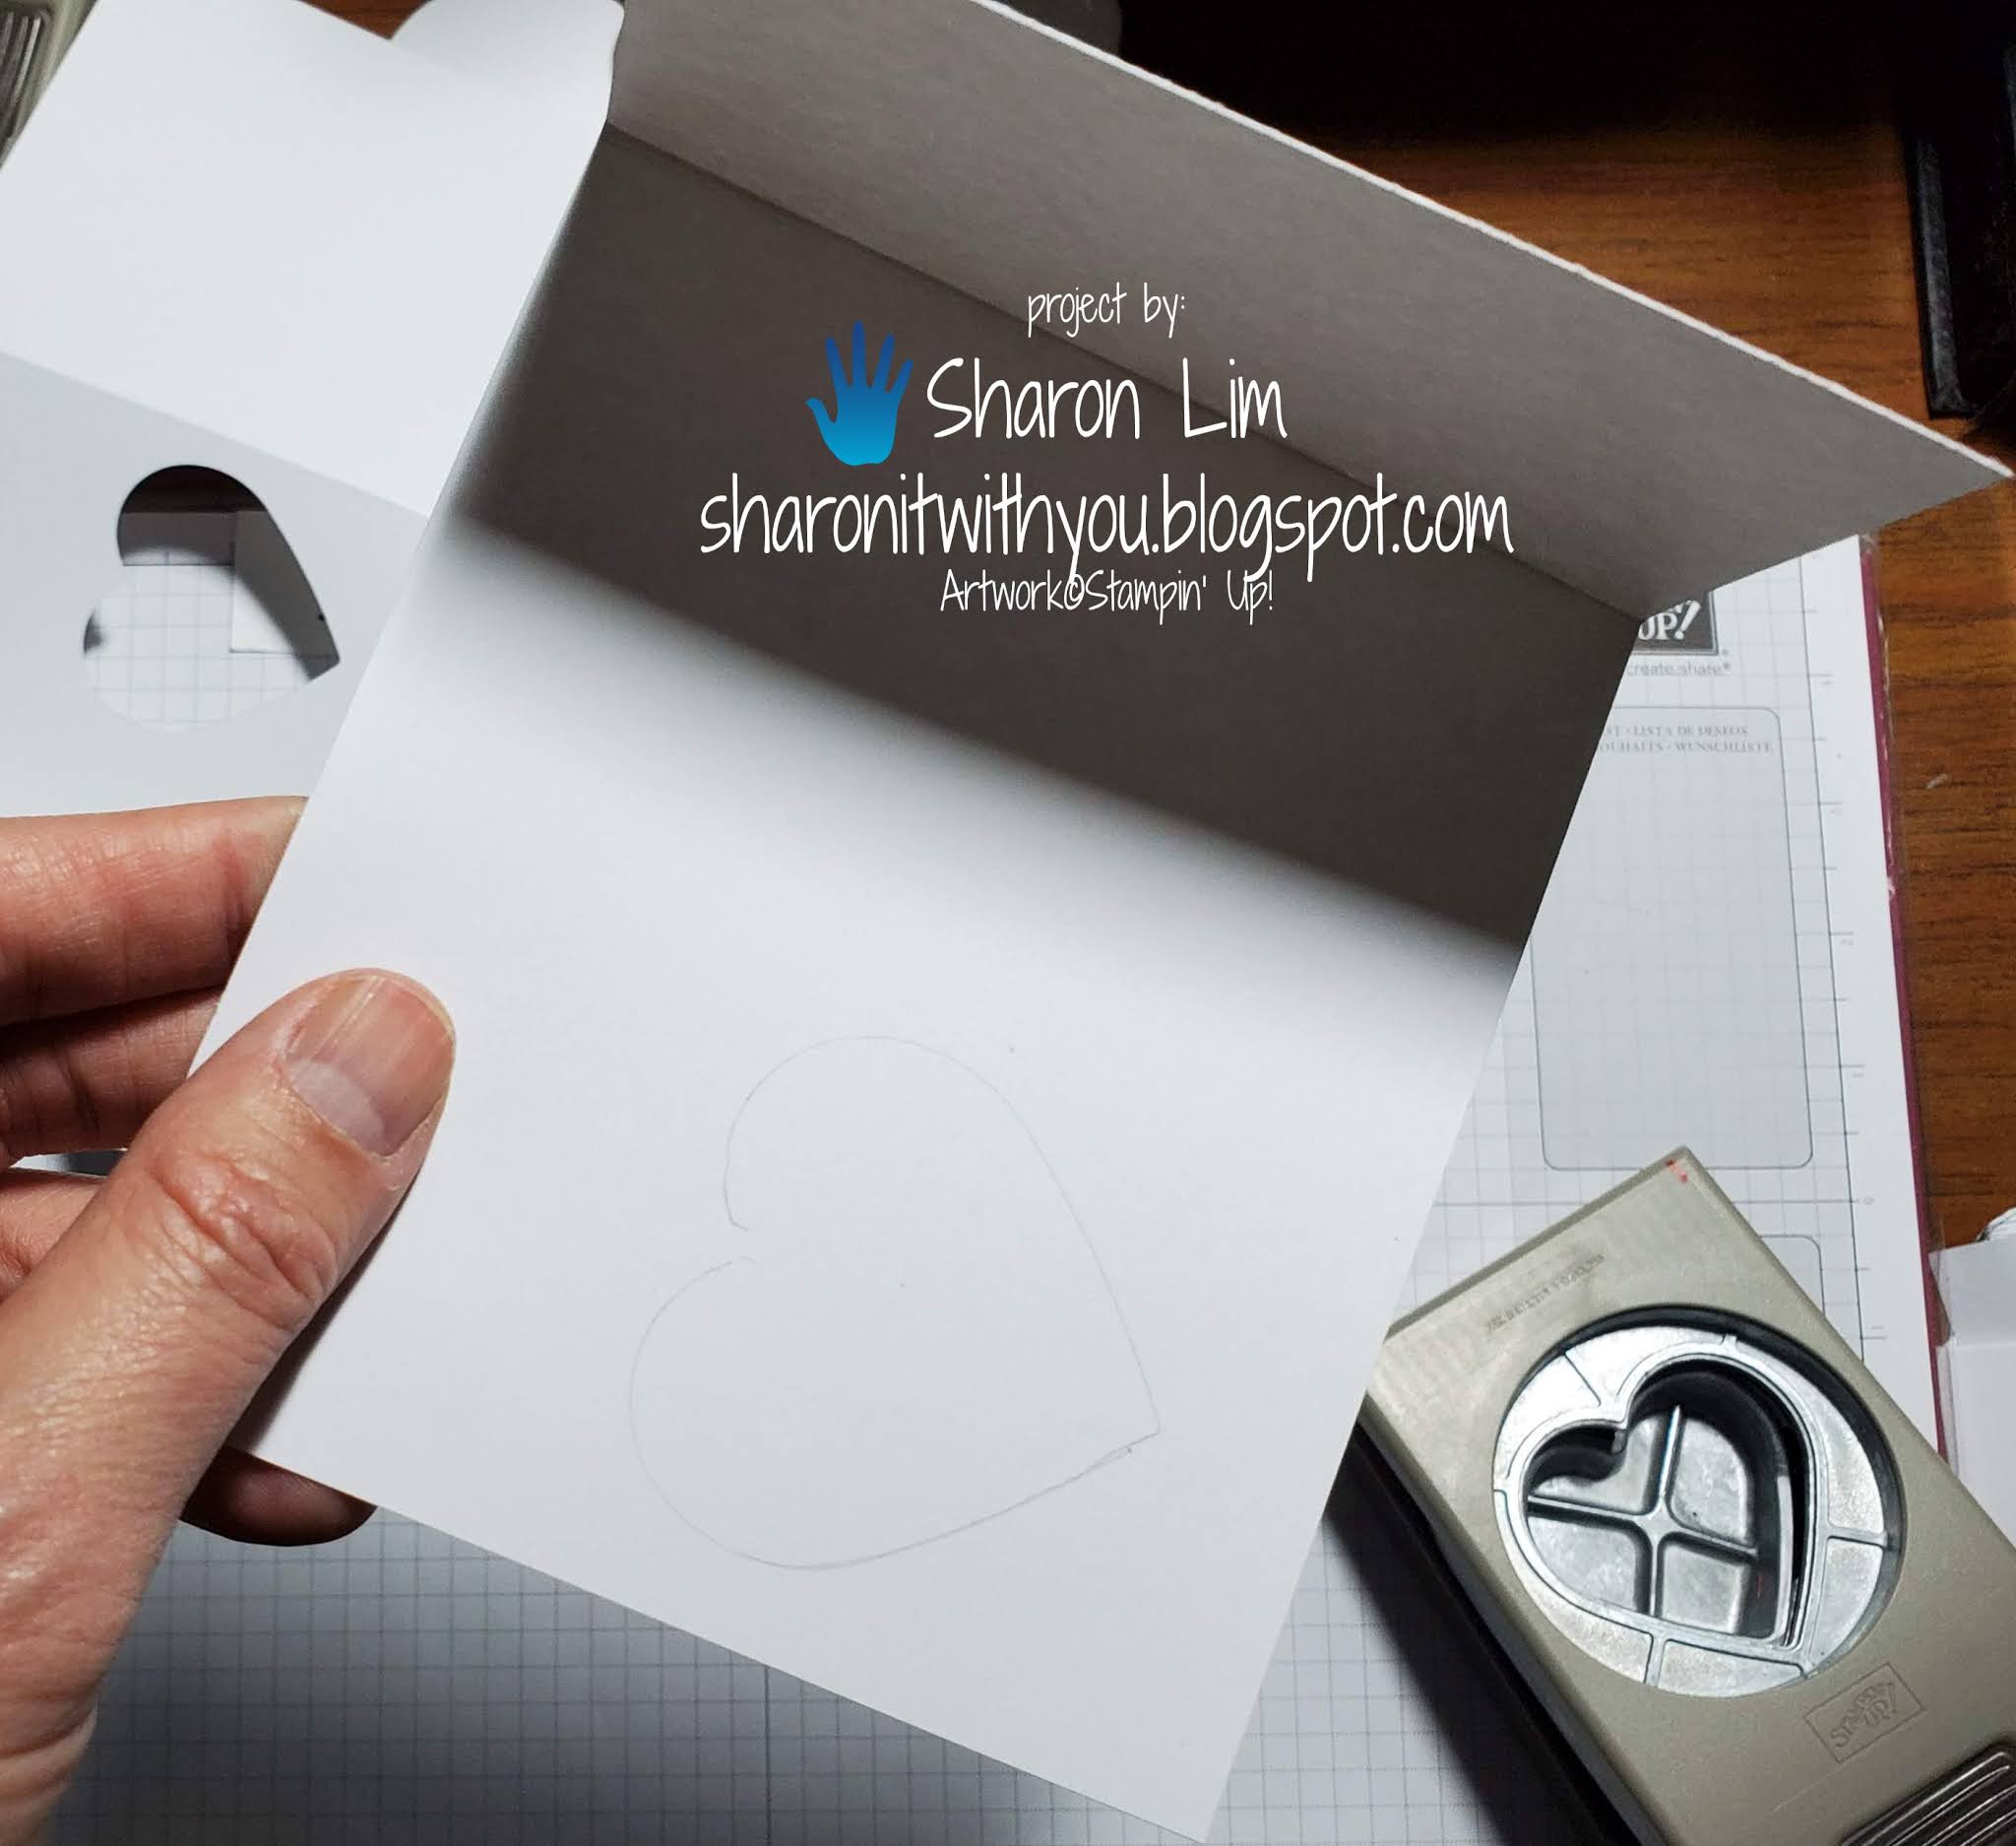
Take the long piece and and punch the first two layers with the heart punch close to the right side.


Line up both white pieces by the 4-1/4" edge and trace with a pencil on the inside to show you where to punch through the smaller piece of Basic White.

Now you have 3 hearts to match up.

Place glue on the first panel of the long piece around the heart, and place the short piece and match the hearts.

Your card should look like this, make sure the little piece from the front is between the back fold:

Adhere the small piece of DSP to the back of the card, then adhere the large piece of DSP to the front and mark the opposite side with a red Sharpie.

Line up the punch, and punch the heart out.

Close the card and stamp the first sentiment then open the card and stamp the second sentiment.

To decorate the outside of the card, punch a scallop heart out of Basic White, a heart out of Rococo Rose, raise it up with some Dimensionals. Then stamp 3 envelopes with Rococo Rose and fussy cut them out and place Dimensionals on the back of each one.

Here is the video to walk you through how to make this Hidden Message card.
Thank you for checking in!
Looking forward to sharing more with you next time.
Sharon
Sharon
CLICK ON THE IMAGES BELOW TO ORDER SUPPLIES TO MAKE THIS CARD


")
")


Sharon Lim
Stampin' Up! Independent Demonstrator
Rubber Stamps and Accessories including Scrapbooking
EMAIL: sharonitwithyou@gmail.com
CELL: (707)486-3500
No comments:
Post a Comment