Hello,
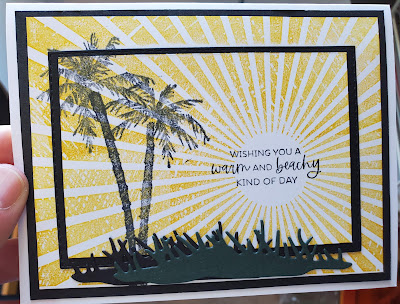
I love the double layer card. This one I used both the Rays of Light background stamp and Paradise Palms stamp set and Palms dies.
And here is the finished card again. What do you think?
Here are some other cards I made before with a similar technique. Here's another Double Layer with only one image. The link to the full blog post: https://sharonitwithyou.blogspot.com/2020/07/double-layer-card.html
Pretty cool techniques, right?
Please support me by:
- Signing up to get my blog posts
- Subscribing to my YouTube channel
- Shop with me for FABULOUS Stampin' Up! products
- Join my team and enjoy 20% off (or more) with no selling!
- Any questions? Email me at sharonitwithyou@gmail.com and I would be happy to help!
Looking forward to sharing more with you next time.
Sharon
Sharon Lim
Stampin' Up! Independent Demonstrator
Rubber Stamps and Accessories including Scrapbooking


No comments:
Post a Comment